Creating an equation solver GUI app using Python Tkinter
Creating the interface
1. Install the PAGE app as discussed here.
2. Open the PAGE app by double-clicking on the PAGE shortcut on the desktop (Windows) or by the command ./page (Linux).
3. On the screen you will see four entities: PAGE, Widget toolbar, Widget tree, and Attribute editor as shown below.
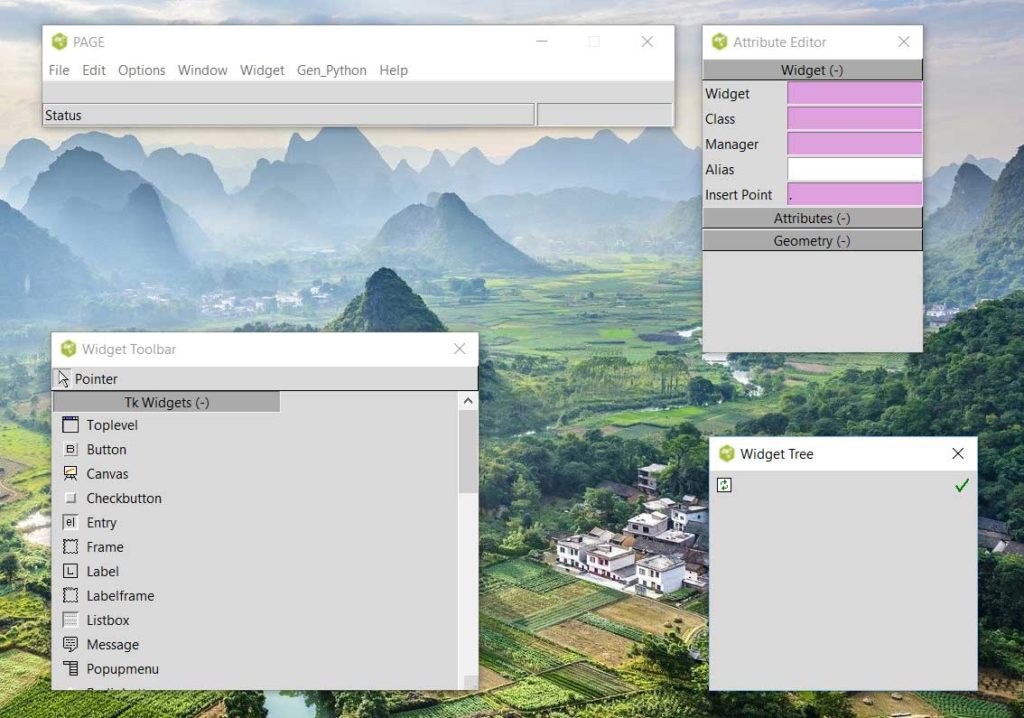
4. Create a new Toplevel by clicking on Toplevel in Widget Toolbar. Go to Attribute Editor, and on the attribute title give a title for the new Toplevel.
5. To create a new button on the Toplevel, click on Button on the Widget Toolbar and then click on the Toplevel. Using the mouse you can drag and position the button. To change the label on the button, click on the button, and then on the Attribute Editor change the value of the text attribute.
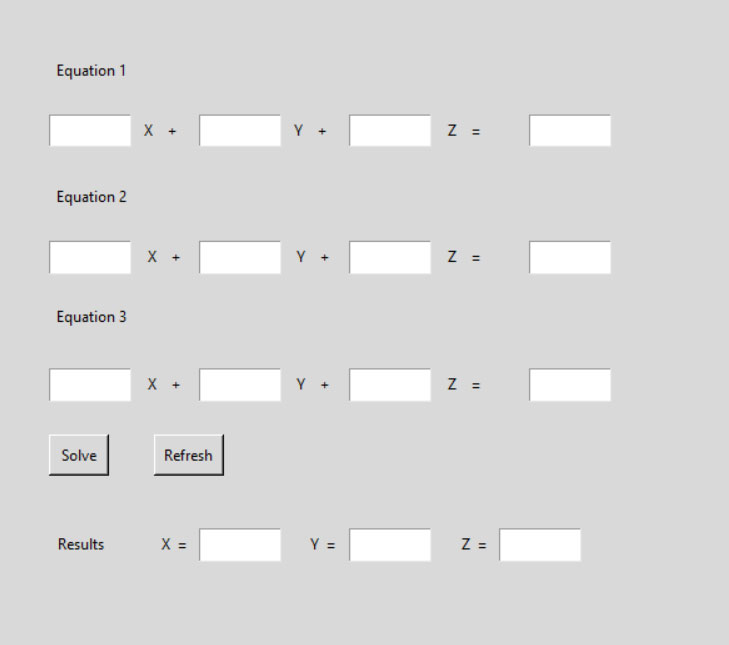
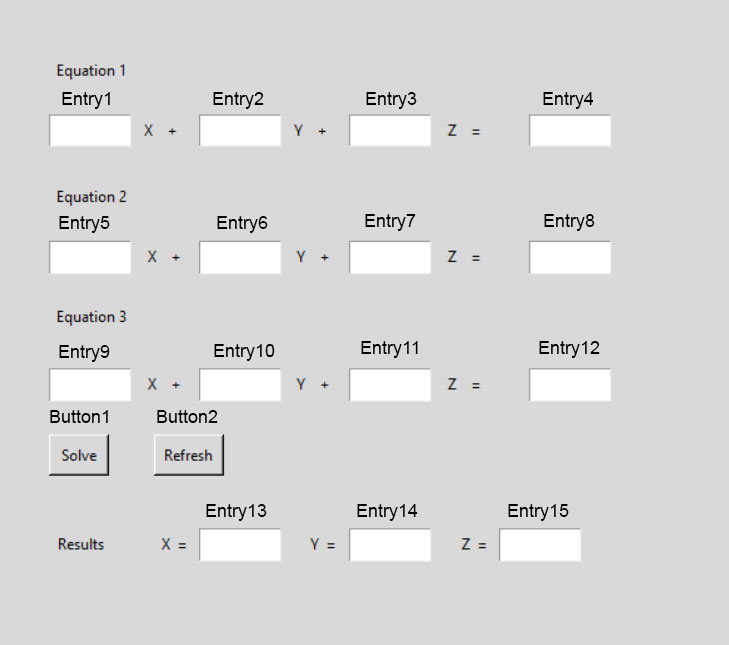
6. Similarly, you can click on Label, and Entry on the Widget Toolbar and position them on the Toplevel using the mouse and create the interface given below.t
7. In the PAGE toolbar, click on File –> Save to save the creation as a tcl file with a filename of your choice.
8. In the PAGE toolbar, click on Gen_Python –> Generate Support Module. This will open up a Support Console. At the bottom of the Support Console click Save. This will create a _support.py file at the location where you saved the tcl file (the is the name you gave for the tcl file.).
9. In the PAGE toolbar, click on Gen_Python –> Generate Python GUI. This will open up a window with the name GUI console. At the bottom click Save. At this point filename_you_gave.tcl file, the filename_you_gave_support.py file, and the filename_you_gave.py file are all in the same folder location.
10. Assuming you have installed Anaconda as described here, you can start Anaconda spyder (which stands for Scientific Python Development Environment) as given below.
Windows users
Open Anaconda Prompt from the start menu and type spyder and press Enter.
Linux users
Open a terminal and type spyder and press Enter.
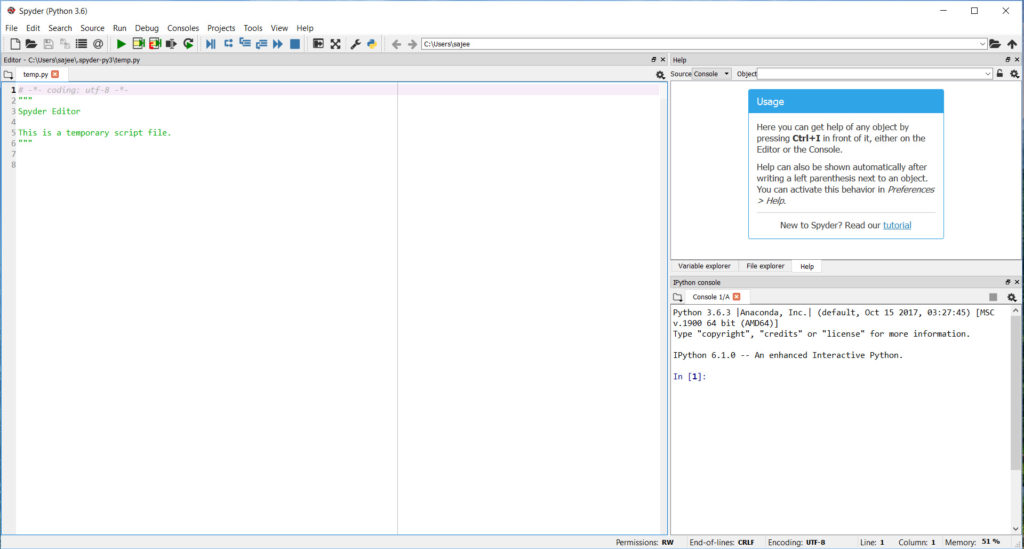
11. The spyder IDE will open up as below.
12. Go to file –> open and open the filename_you_gave.py file. You can go to Tools –> Preferences –> Python interpreter to configure the path for the Python interpreter of your choice. The default is the path for the Python interpreter that comes with the Anaconda installation.
13. Click on the green triangle below the Run tab to run your python file. You will see that the GUI you created using PAGE opens up. This will verify that up to now everything is as expected. Now we have to add Python code so that our GUI functions as an equation solver which we are going to discuss next.
The theory behind an equation solver that solves a system of linear equations
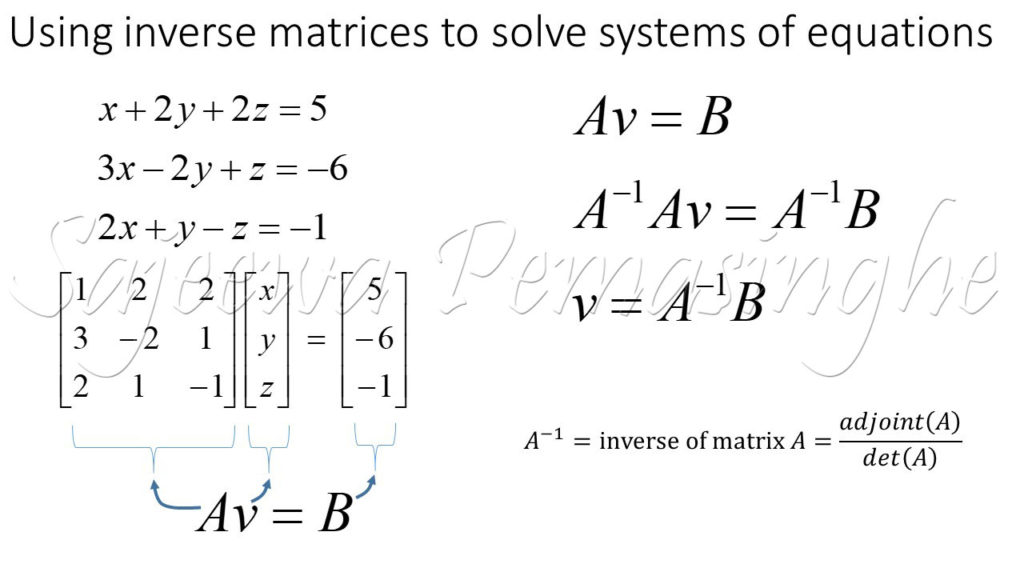
14. As shown above, to find the values of x,y, and z we have to take the dot product between the inverse of matrix A and matrix B. Next, we are going to see how this theory can be implemented using Python code.
Implementation of the theory using Python code
Importing packages and defining functions
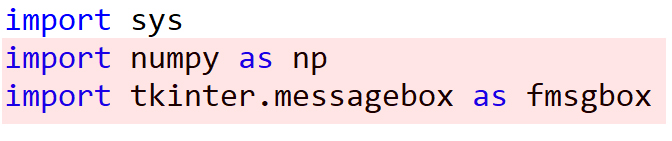
15. The tools I need to implement the theory are inside the numpy (stands for numerical python) package. I also need to display messages as message boxes depending on the user input. So I am importing these two packages using following python code which I will add just under the import sys statement at the top of the .py file.
16. Next, we are going to add new functions to implement the functionality we need. Where should we add this new code? In step #4 you gave a title to the PAGE Toplevel. The name I gave was solver. So in the .py file I have to add my new code in between the lines that say class solver: and def _init_(self, top=None):.

17. To facilitate the understanding of the code that follows I have given below the PAGE aliases for each Entry box and Button. In your case these aliases can be found by opening the saved tcl file using PAGE and looking for the alias attribute in the Attribute Editor.
18. As explained in step #16 the code I have added between class solver: and def _init_(self, top=None): is shown below. The code will be explained in detail below starting from step #19.
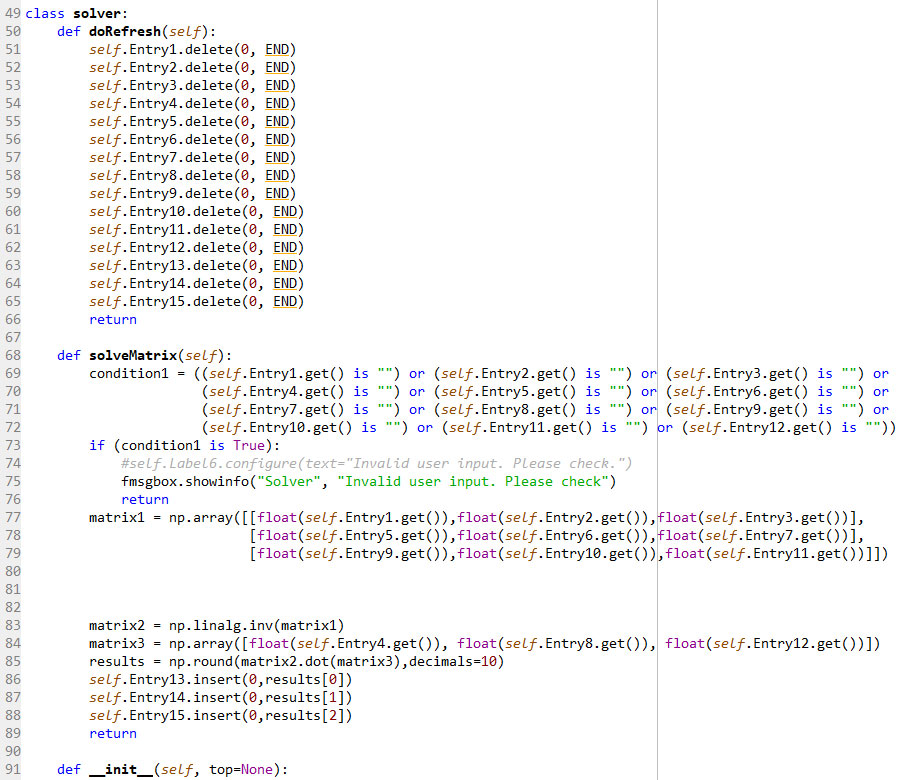
19. In the above code, from line #50 to line #66 I have defined a function named doRefresh which accepts the current GUI object (also called self) as an argument. from line #68 to line #89 I have defined another function named solveMatrix which also accepts the current GUI object as an argument.
20. self.Entry1.delete(0, END) function deletes the contents of the Entry1 box from the character index 0 until the last character. So basically the action of the doRefresh function is to delete the contents of all the Entry boxes from Entry1 box to Entry15 box.
21. self.Entry1.get() is “” function gets the content of the Entry1 box and checks to see if it is an empty String. If the Entry1 box is empty, self.Entry1.get() is “” returns True. If not, it returns False. The code from line #69 to line #72 checks for emptiness of each Entry box and connects the resultant outputs with or logic gates. If at least any of the Entry boxes is empty, condition1 variable is assigned a value of True. Code at line #73 checks if the condition1 has the value True. If the value is True (which means at least one of the Entry boxes is Empty) by the code at line #75 a message box pops up with the message “Invalid user input. Please check”. The title of the message box is “Solver”.
22. The code from line #77 to line #79 gets the content of Entry1 box, Entry2 box, Entry3 box, Entry5 box, Entry6 box, Entry7 box, Entry9 box, Entry10 box, Entry11 box , converts each of those String values to float values. Thereafter it creates a 3 x 3 numpy array object (which is equivalent to a 3 x 3 matrix) out of those float values and assigns it to the variable matrix1. matrix1 is equivalent to matrix A in figure 4.
23. numpy.linalg contains functions that carry out linear algebra operations. As we have previously used the code import numpy as np ,wherever we have to refer to numpy we can use np instead for our convenience. At line #83 by matrix2 = np.linalg.inv(matrix1) we calculate the inverse matrix of matrix1 and assign it to the variable matrix2.
24. Code at line #84 gets the content of Entry4 box, Entry8 box, Entry12 box, converts each of those String values to float values. Thereafter it creates a 3 x 1 numpy array object (which is equivalent to a 3 x 1 matrix) out of those float values and assigns it to the variable matrix3. matrix3 is equivalent to matrix B in figure 4.
25. At line #85 matrix2.dot(matrix3) carries out the dot product between matrix2 and matrix3 which is equivalent to the product of inverse matrix of A and matrix B in figure 4. Since the product is between a 3 x 3 matrix and a 3 x 1 matrix, the resulting matrix is a 3 x 1 matrix. Then the np.round function rounds off these three values to 10 decimal places and assigns the resulting array object to the variable results.
26. self.Entry13.insert(0,results[0]) inserts the value of results[0] (which is the value of x) in the Entry13 box starting from the index 0. self.Entry14.insert(0,results[1]) inserts the value of results[1] (which is the value of y) in the Entry14 box starting from the index 0. self.Entry15.insert(0,results[2]) inserts the value of results[2] (which is the value of z) in the Entry15 box starting from the index 0.
Binding the functions with corresponding Button click events
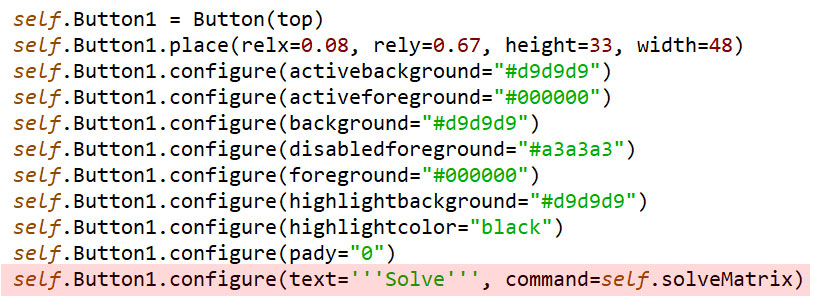
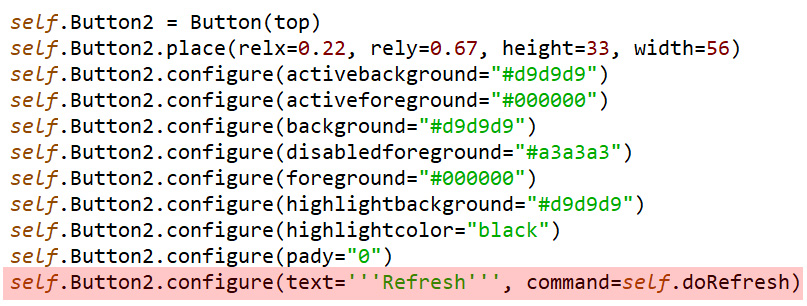
27. The doRefresh function should bind to the click of the Refresh button (which has the alias Botton2) and the solveMatrix function should bind to the click of the solve button (which has the alias Button1). These can be achieved using the command attribute of the Button.configure function as shown below.
28. N.B. If the Button, Entry, Label positions in PAGE and when opened from spyder are slightly different, use the relx and rely attributes of the particular Button, Entry etc. to reposition them according to your liking.